Introduction
See for yourself how easy it is to create a simple inventory management web application using Cloudera Operational Database and Cloudera AI.
Prerequisites
- Have access to Cloudera on cloud
- Have created a Cloudera workload User
- Ensure proper Cloudera AI role access
- MLUser: ability to run workloads
- MLAdmin: ability to create and delete workspaces

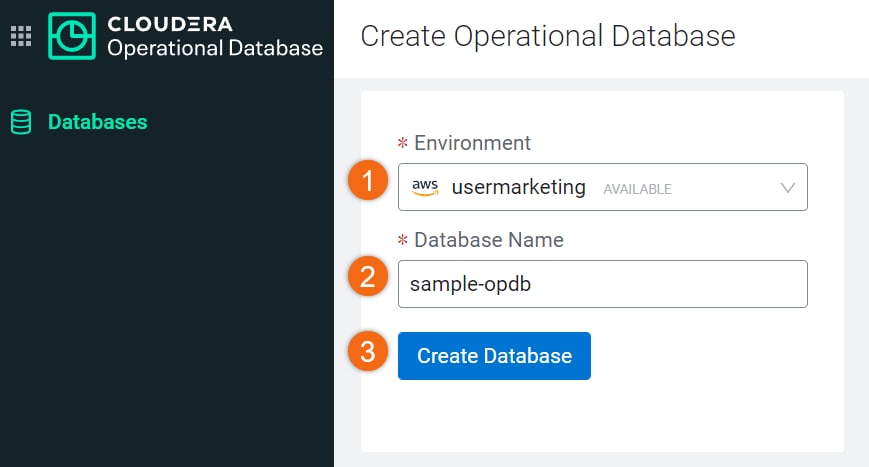
Two simple pieces of information are needed to create a database - the Environment name and Database name. For example:
- Environment: <your environment name>
- Database Name:
sample-opdb - Select Create Database
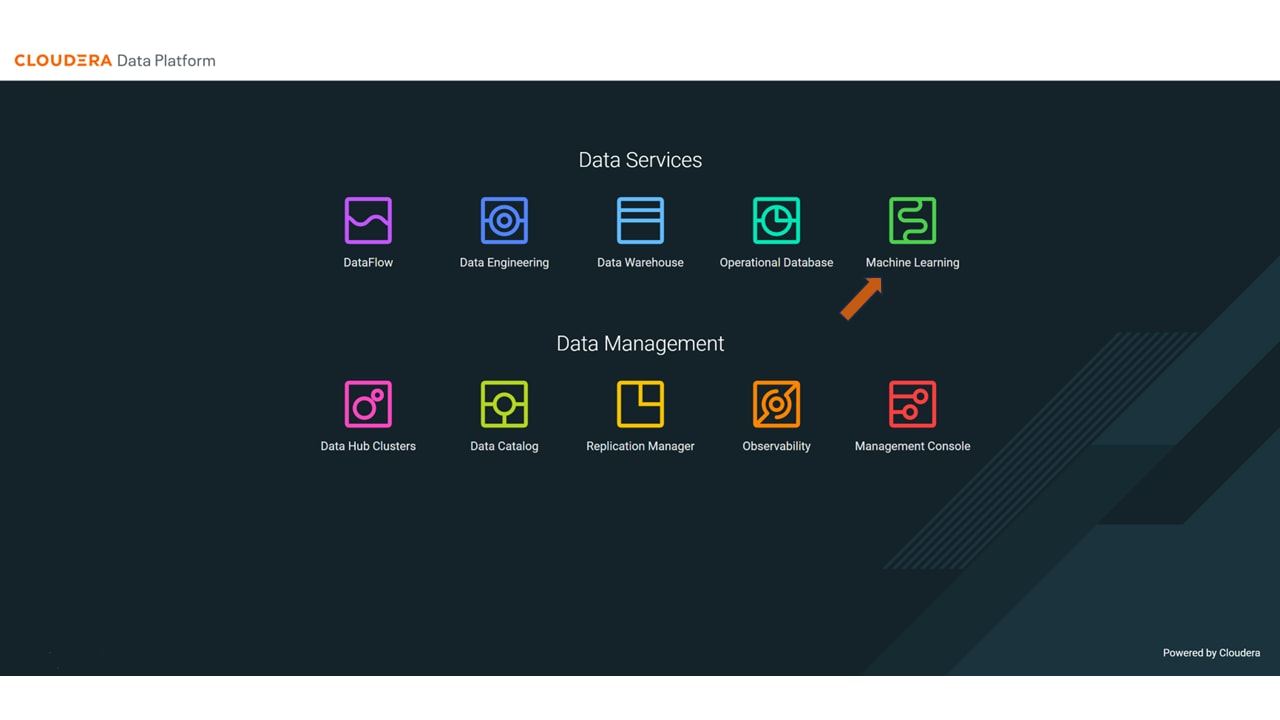
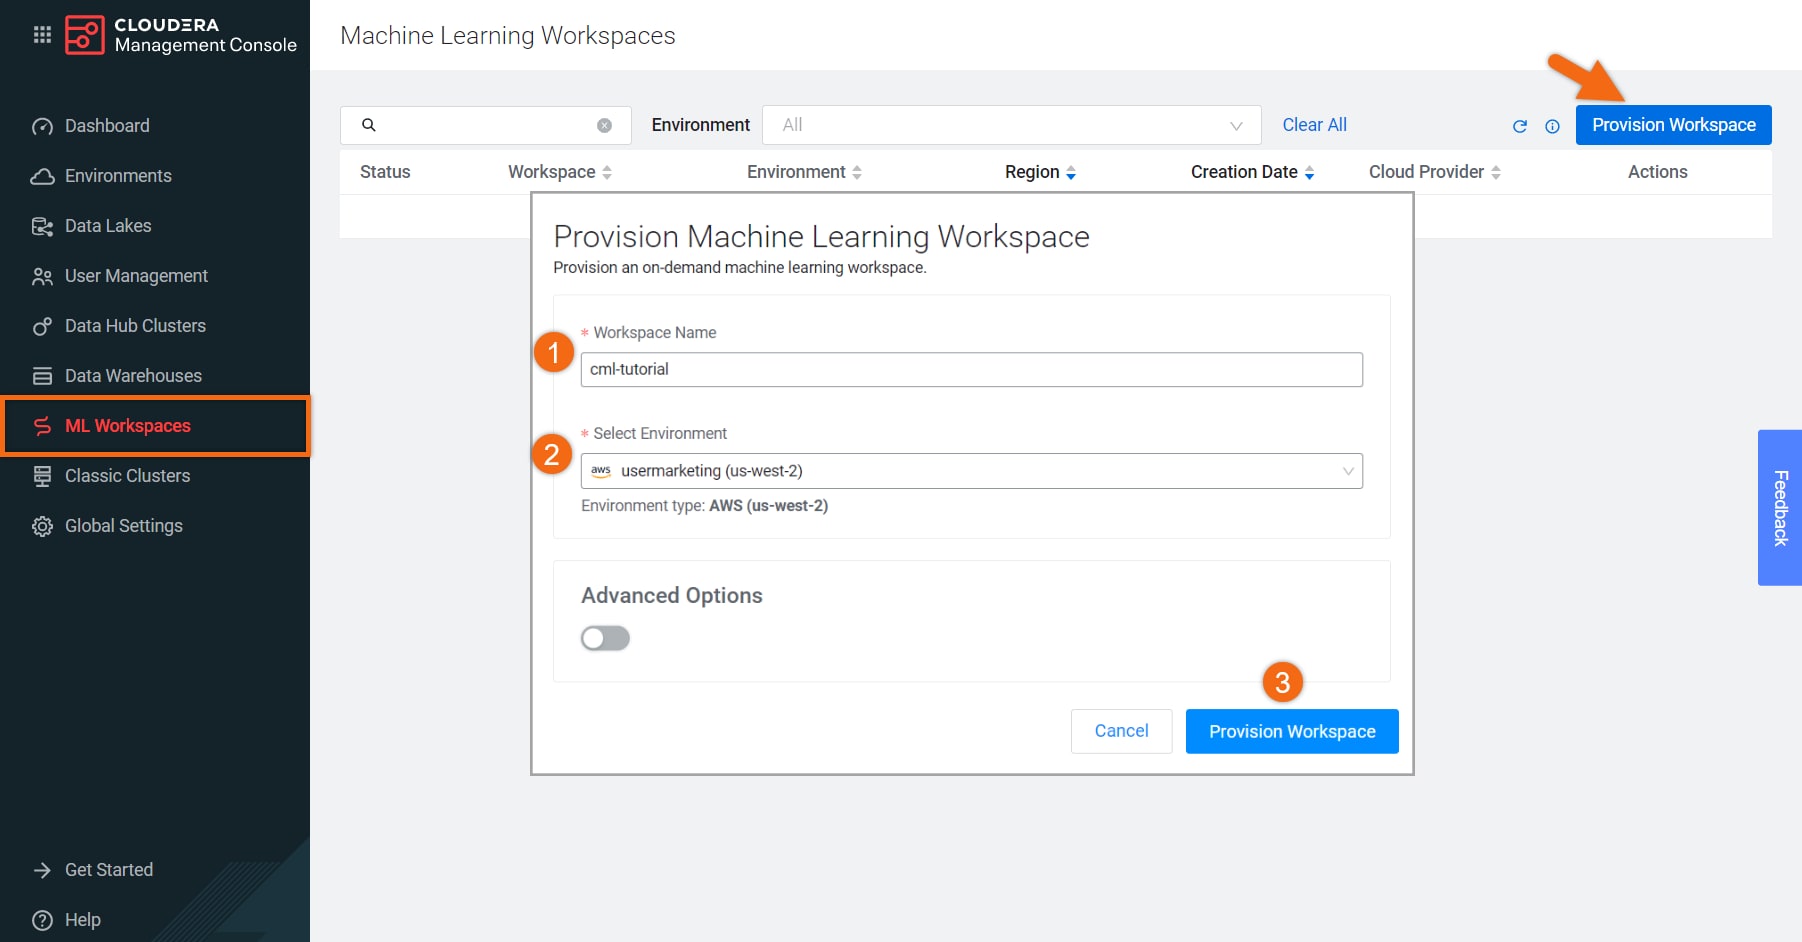
In the ML Workspaces section, select Provision Workspace.
Two simple pieces of information are needed to provision an ML workspace - the Workspace name and the Environment name. For example:
- Workspace Name:
cml-tutorial - Environment: <your environment name>
- Select Provision Workspace
Create project
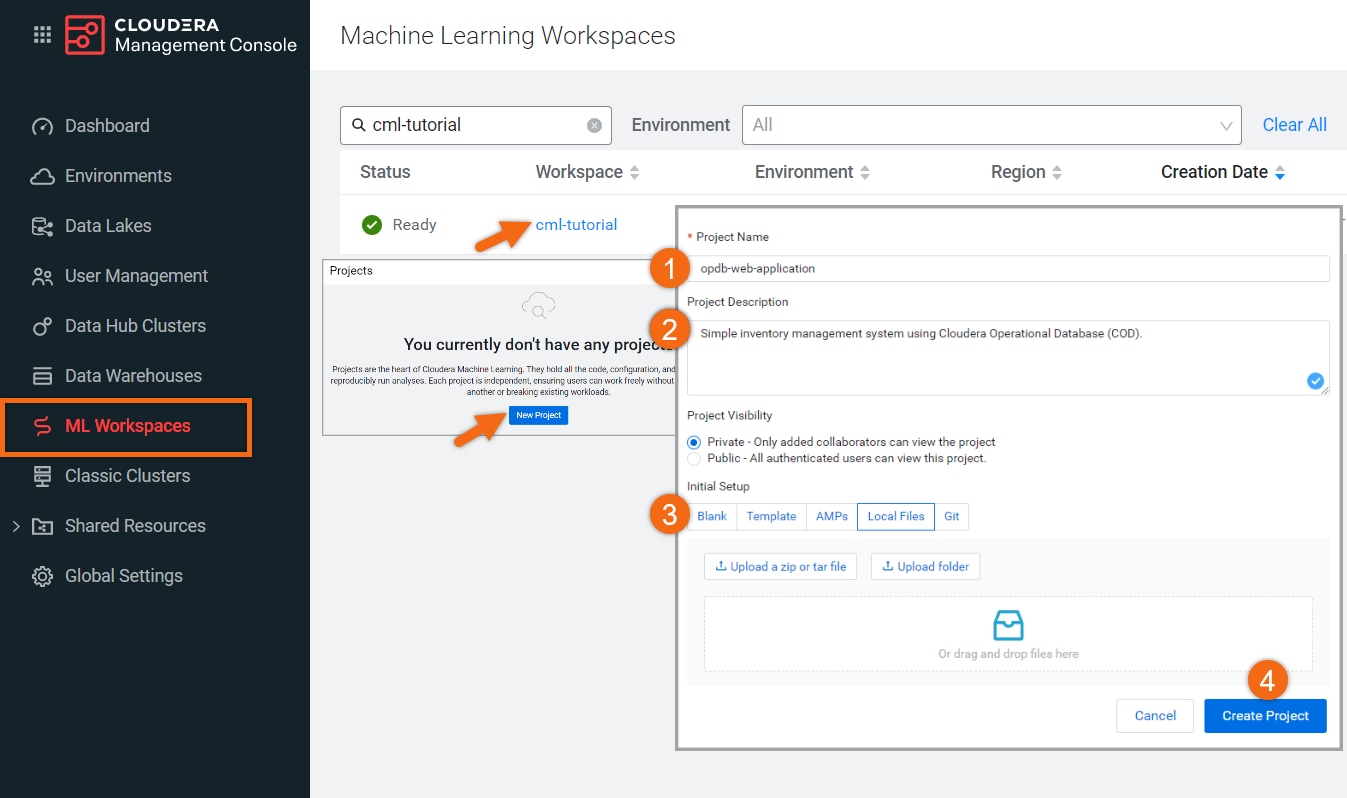
Beginning from the ML Workspaces section, open your workspace by selecting its name, cml-tutorial.
Select New Project
Complete the New Project form using:
- Project Name:
opdb-web-application - Project Description:
Simple inventory management system using Cloudera Operational Database (COD)
- Initial Setup: Local Files
Upload or Drag-Drop tutorial-files.zip you downloaded earlier - Select Create Project
Application configuration
Beginning from the Projects section, select the project name, opdb-web-application.
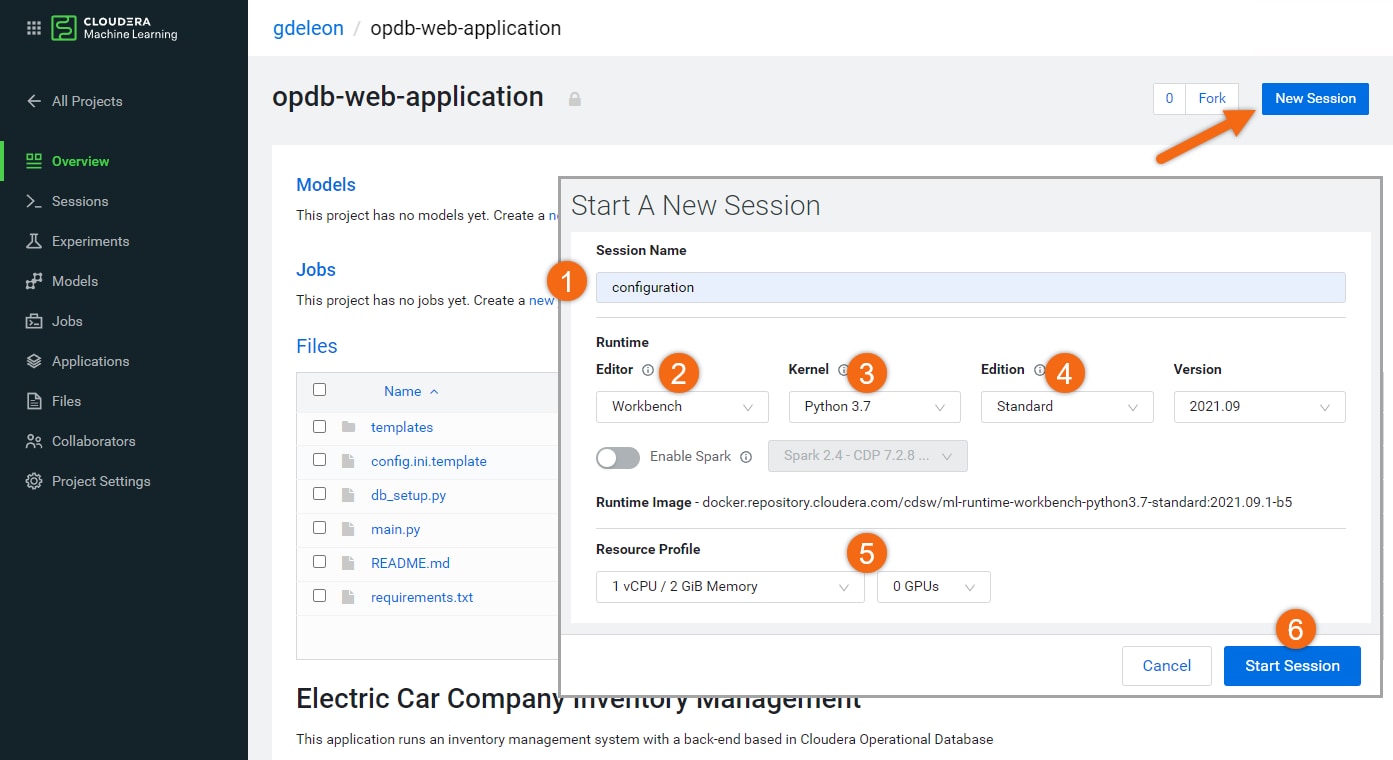
Select New Session and complete the session form:
- Session Name:
configuration - Editor: Workbench
- Kernel: Python 3
- Edition: Standard
- Resource Profile: 1 vCPU / 2 GiB Memory
- Select Start Session
Let’s make a minor configuration change and install the dependencies:
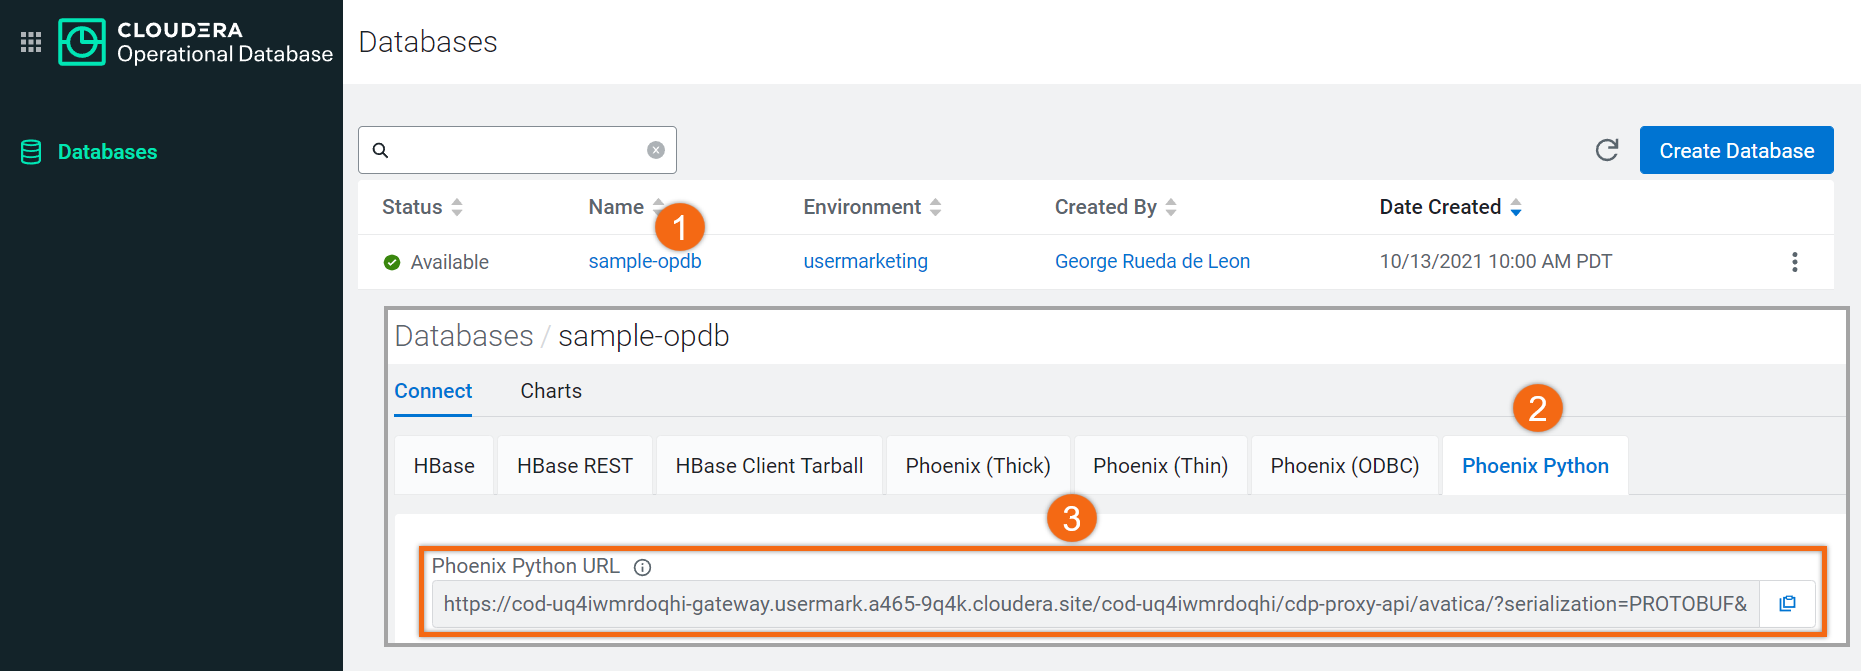
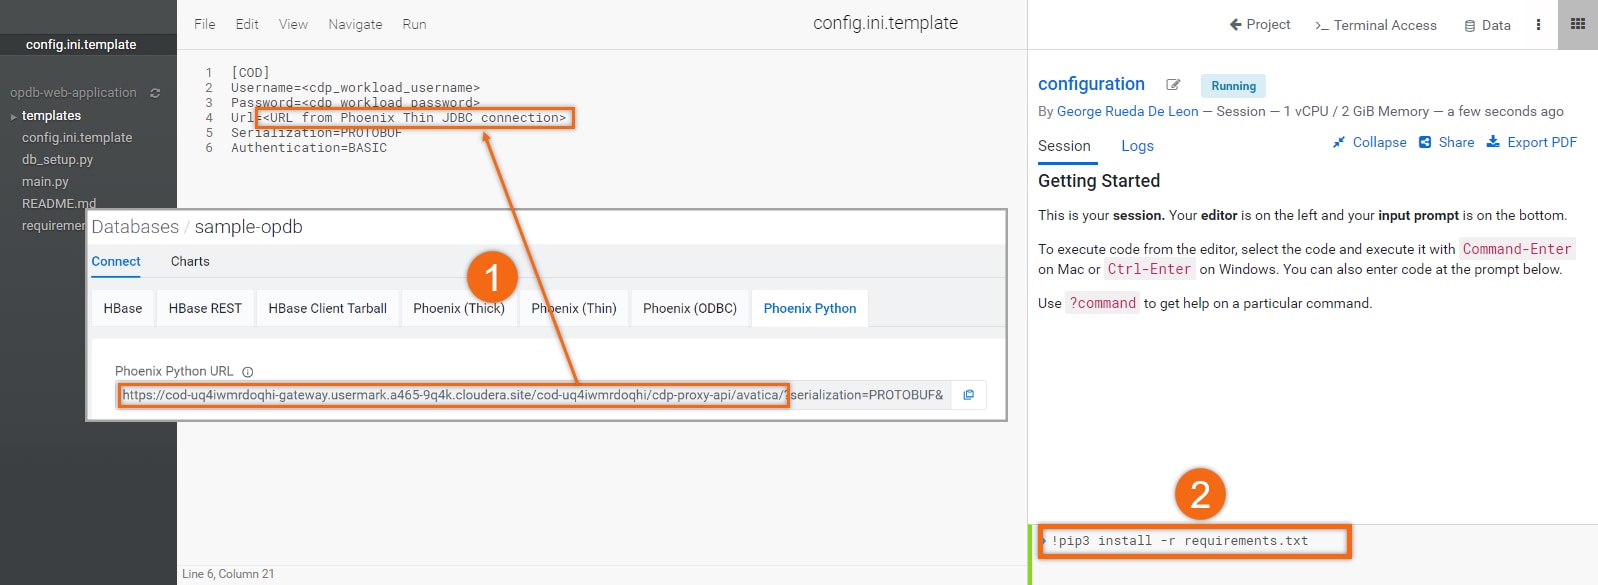
- Modify the configuration file, config.ini.template, with the Phoenix Python URL we retrieved earlier and username/password.
[COD]
Username=<cdp_workload_username>
Password=<cdp_workload_password>
Url=<URL from Phoenix Thin JDBC connection>
Serialization=PROTOBUF
Authentication=BASIC
Save the file as config.ini: File > Save As > config.ini
- Install the dependencies by issuing the following statement in the command-line:
!pip3 install -r requirements.txt
In the same session (or a new one), let’s create and populate a table that we’ll be using in our application.
Select file db_setup.py and click on![]()

Create and run web application
Let’s create our inventory management system web application.
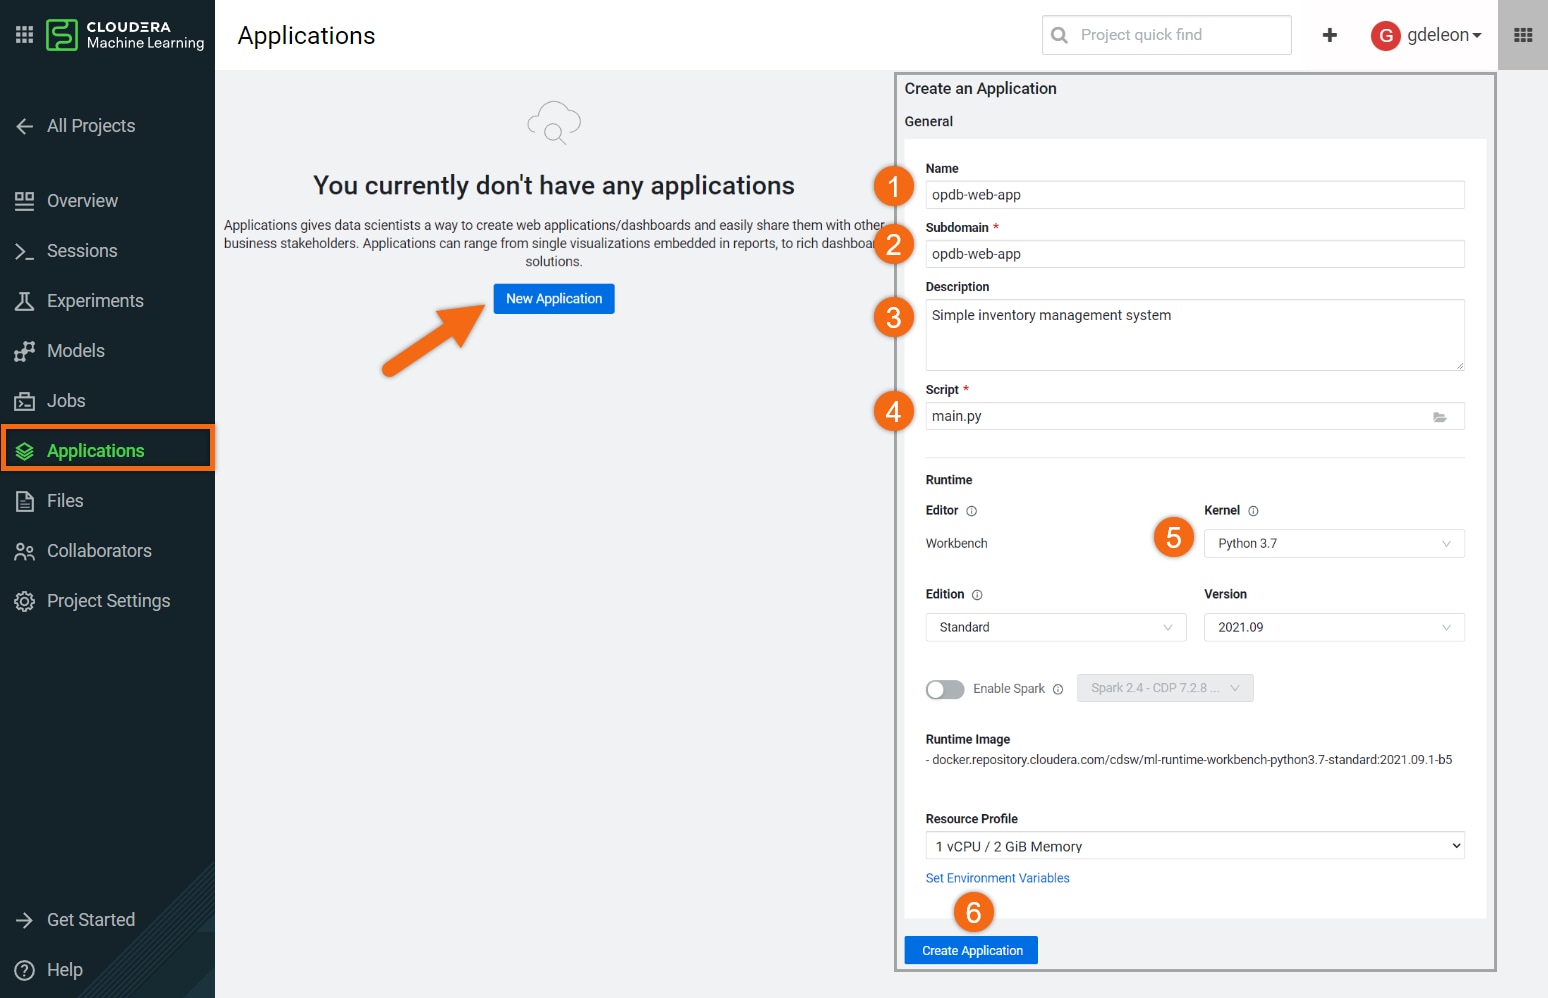
Beginning from the Applications section, select New Application and fill out the form as follows:
- Name:
opdb-web-app - Subdomain:
opdb-web-app - Description:
Simple inventory management system - Script: main.py
- Kernel: Python 3
- Select Create Application
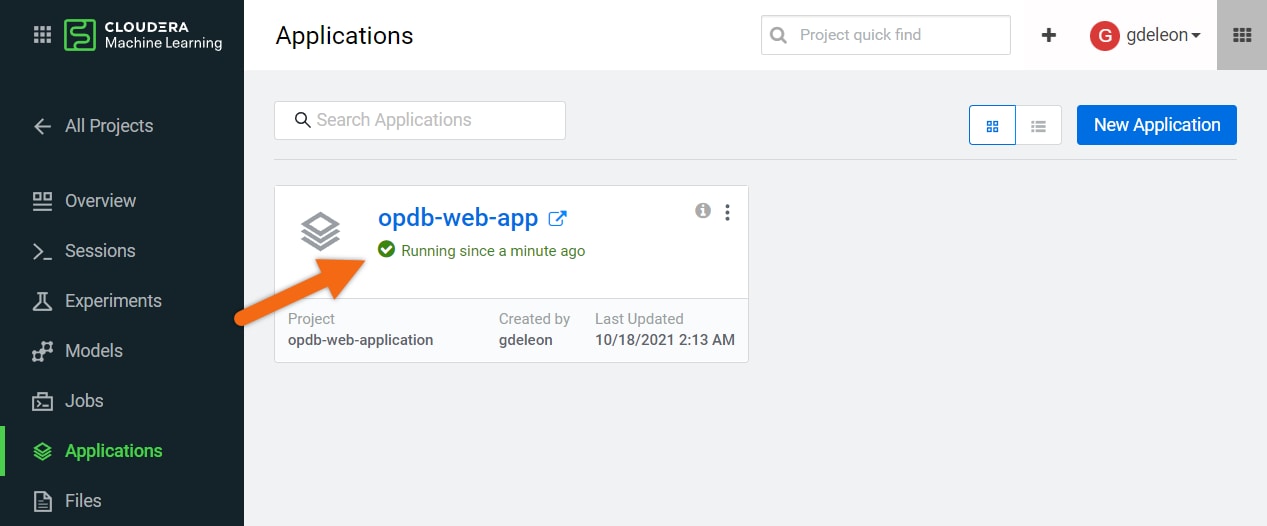
After a few moments, the application is up and running. Select the application’s name, opdb-web-app, to open the web application.
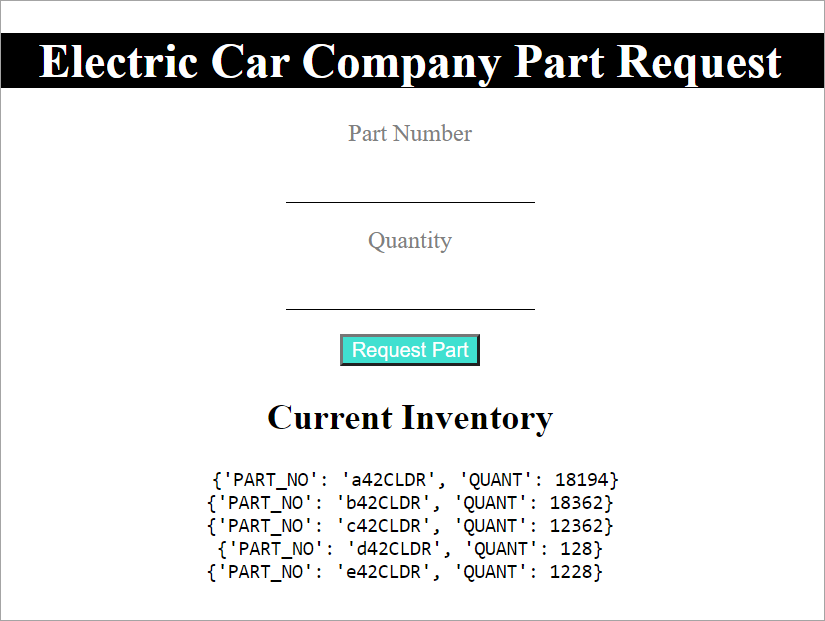
This web application accepts a part number and quantity. It first verifies that the part exists, if it does, it will decrease/increase the quantity on hand. For example:
A positive quantity value, decreases the quantity on hand.
A negative quantity value, increases the quantity on hand.
Further reading
Other
- Have a question? Join Cloudera Community
- Cloudera Operational Database documentation
- Cloudera AI documentation


