Introduction
Learn how to interact with Cloudera Data Engineering on Cloudera on cloud using command line interface (CLI) and restful APIs.
Prerequisites
- Have access to Cloudera Public Cloud with a Cloudera Data Engineering virtual cluster created. Learn how to create Data Engineering virtual cluster in a different tutorial.
- Have created a Cloudera workload User
- Ensure proper Data Engineering role access
- DEUser: access virtual cluster and run jobs
- Basic AWS CLI skills
- Access to jq, a command-line tool for parsing JSON
Download assets
You have two (2) options to get the assets needed for this tutorial:
It contains only necessary files used in this tutorial. Unzip tutorial-files.zip and remember its location.
It provides assets used in this and other tutorials; organized by tutorial title.
Create folder: $HOME/.cde
mkdir -p $HOME/.cde
Move config.yaml to .cde folder:
mv config.yaml $HOME/.cde/
Using AWS CLI, copy data files PPP-Over-150k-ALL.csv and PPP-Sub-150k-TX.csv to S3 bucket, s3a://<storage.location>/tutorial-data/data-engineering, where <storage.location> is your environment’s property value for storage.location.base.
Note: You may need to ask your environment's administrator to get property value for storage.location.base.
In this example, property storage.location.base has value s3a://usermarketing-cdp-demo, therefore the command will be:
aws s3 cp PPP-Over-150k-ALL.csv s3://usermarketing-cdp-demo/tutorial-data/data-engineering/PPP-Over-150k-ALL.csv
aws s3 cp PPP-Sub-150k-TX.csv s3://usermarketing-cdp-demo/tutorial-data/data-engineering/PPP-Sub-150k-TX.csv
Note: datasets are publicly available from the U.S. Department of the Treasury - Paycheck Protection Program (PPP).

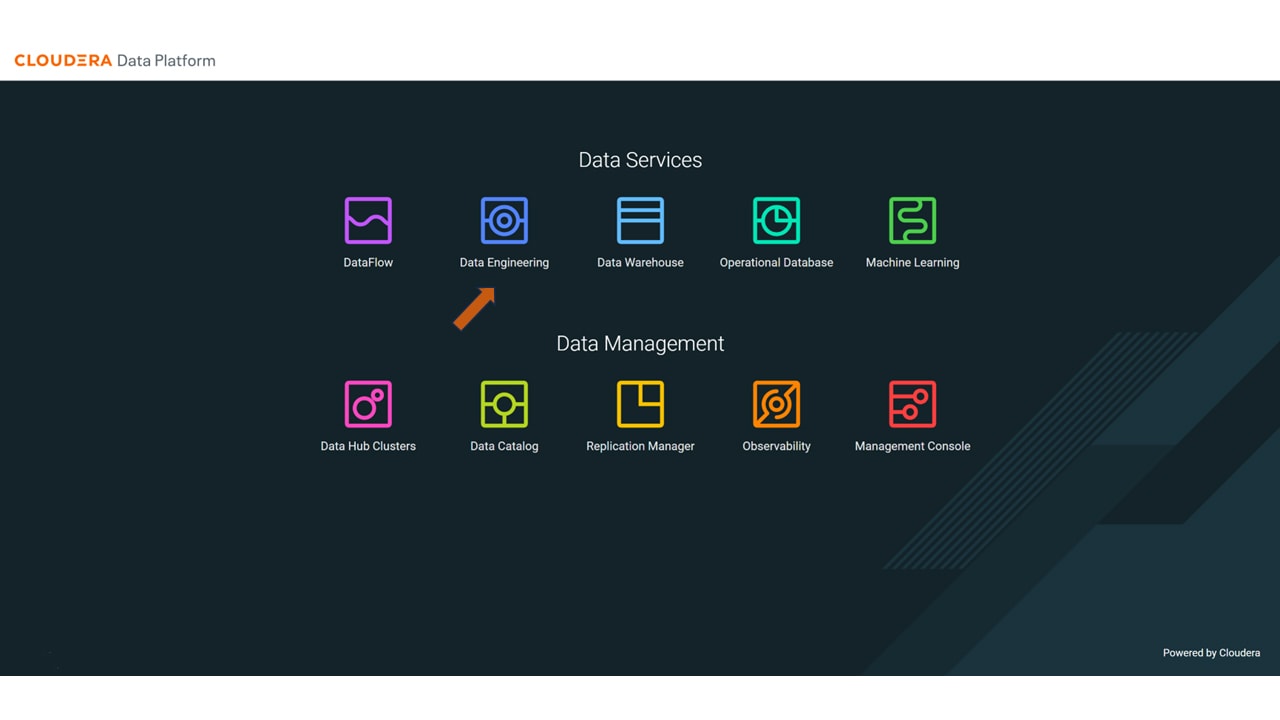
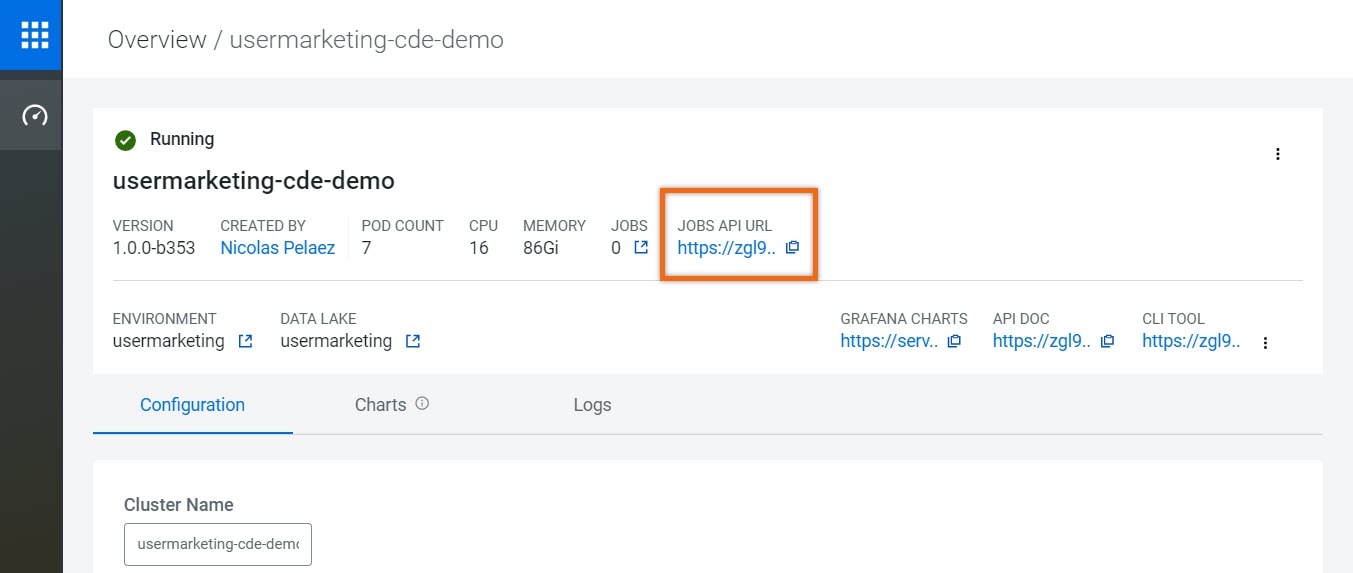
Navigate to Environments (usermarketing) > Virtual Cluster (usermarketing-cde-demo) > ![]() Cluster Details
Cluster Details

Download CLI TOOL based on your operating system.
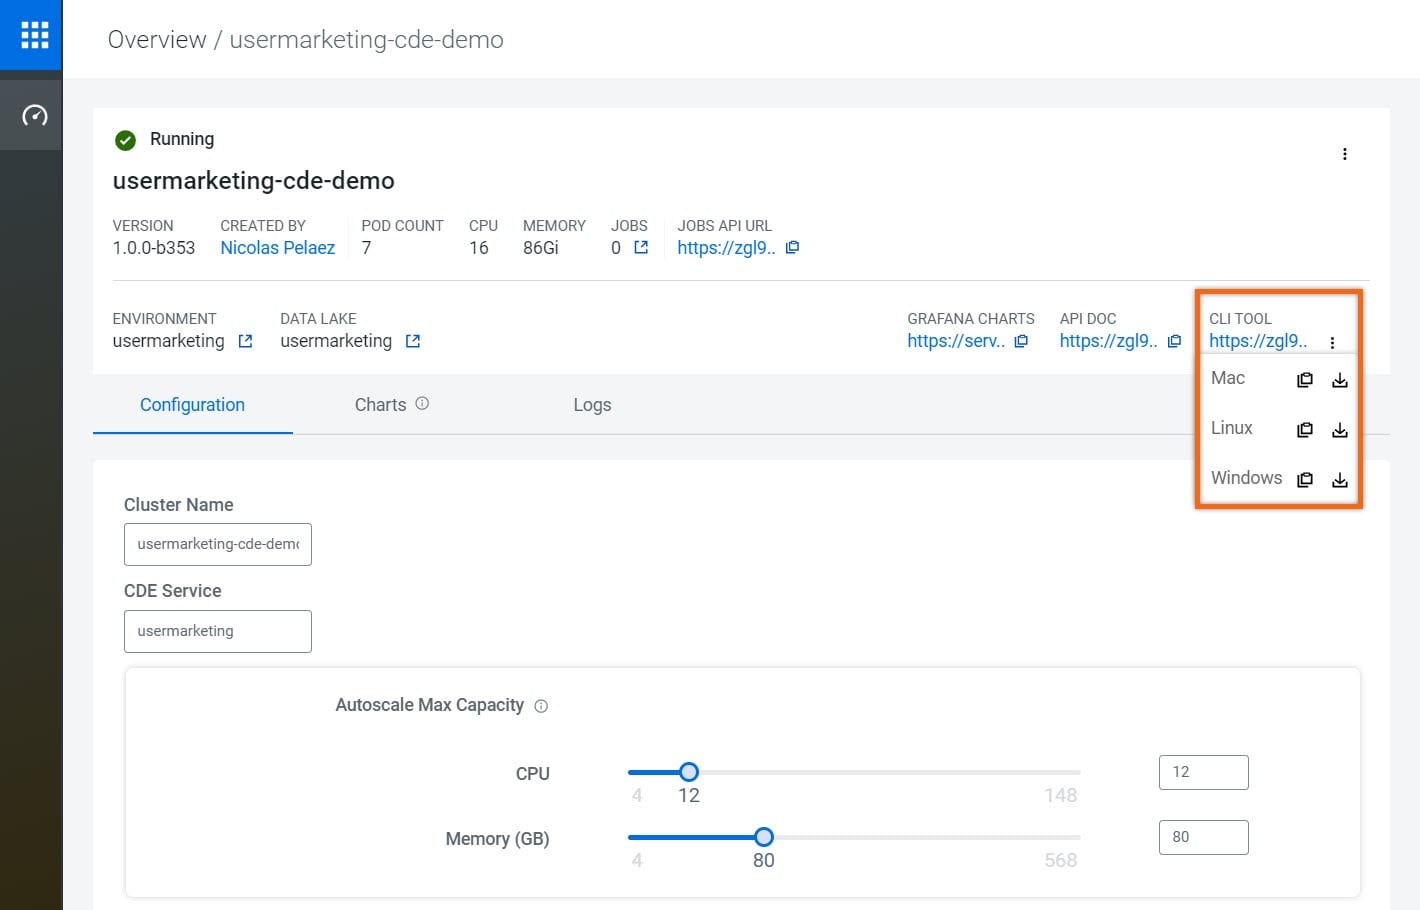
Note: Data Engineering client must be stored where it can be found via $PATH (i.e. /usr/bin) and have execute privileges.
Configure CLI Client
Modify config.yaml, received in Download Assets, as follows:
- Replace <cdp-workload-user> with your workload user name
- Replace <CDE-virtual-cluster-endpoint> with JOBS API URL provided in Cluster Details
The edited file should look something like:

Visit Cloudera Data Engineering CLI configuration options for more information.
Run jobs using CLI
We can run a job immediately (ad-hoc), which is good for testing your application. Another option is to define a resource, which stores a collection of Python files or applications required for a job; great for running jobs periodically.
Run a Job (ad-hoc)
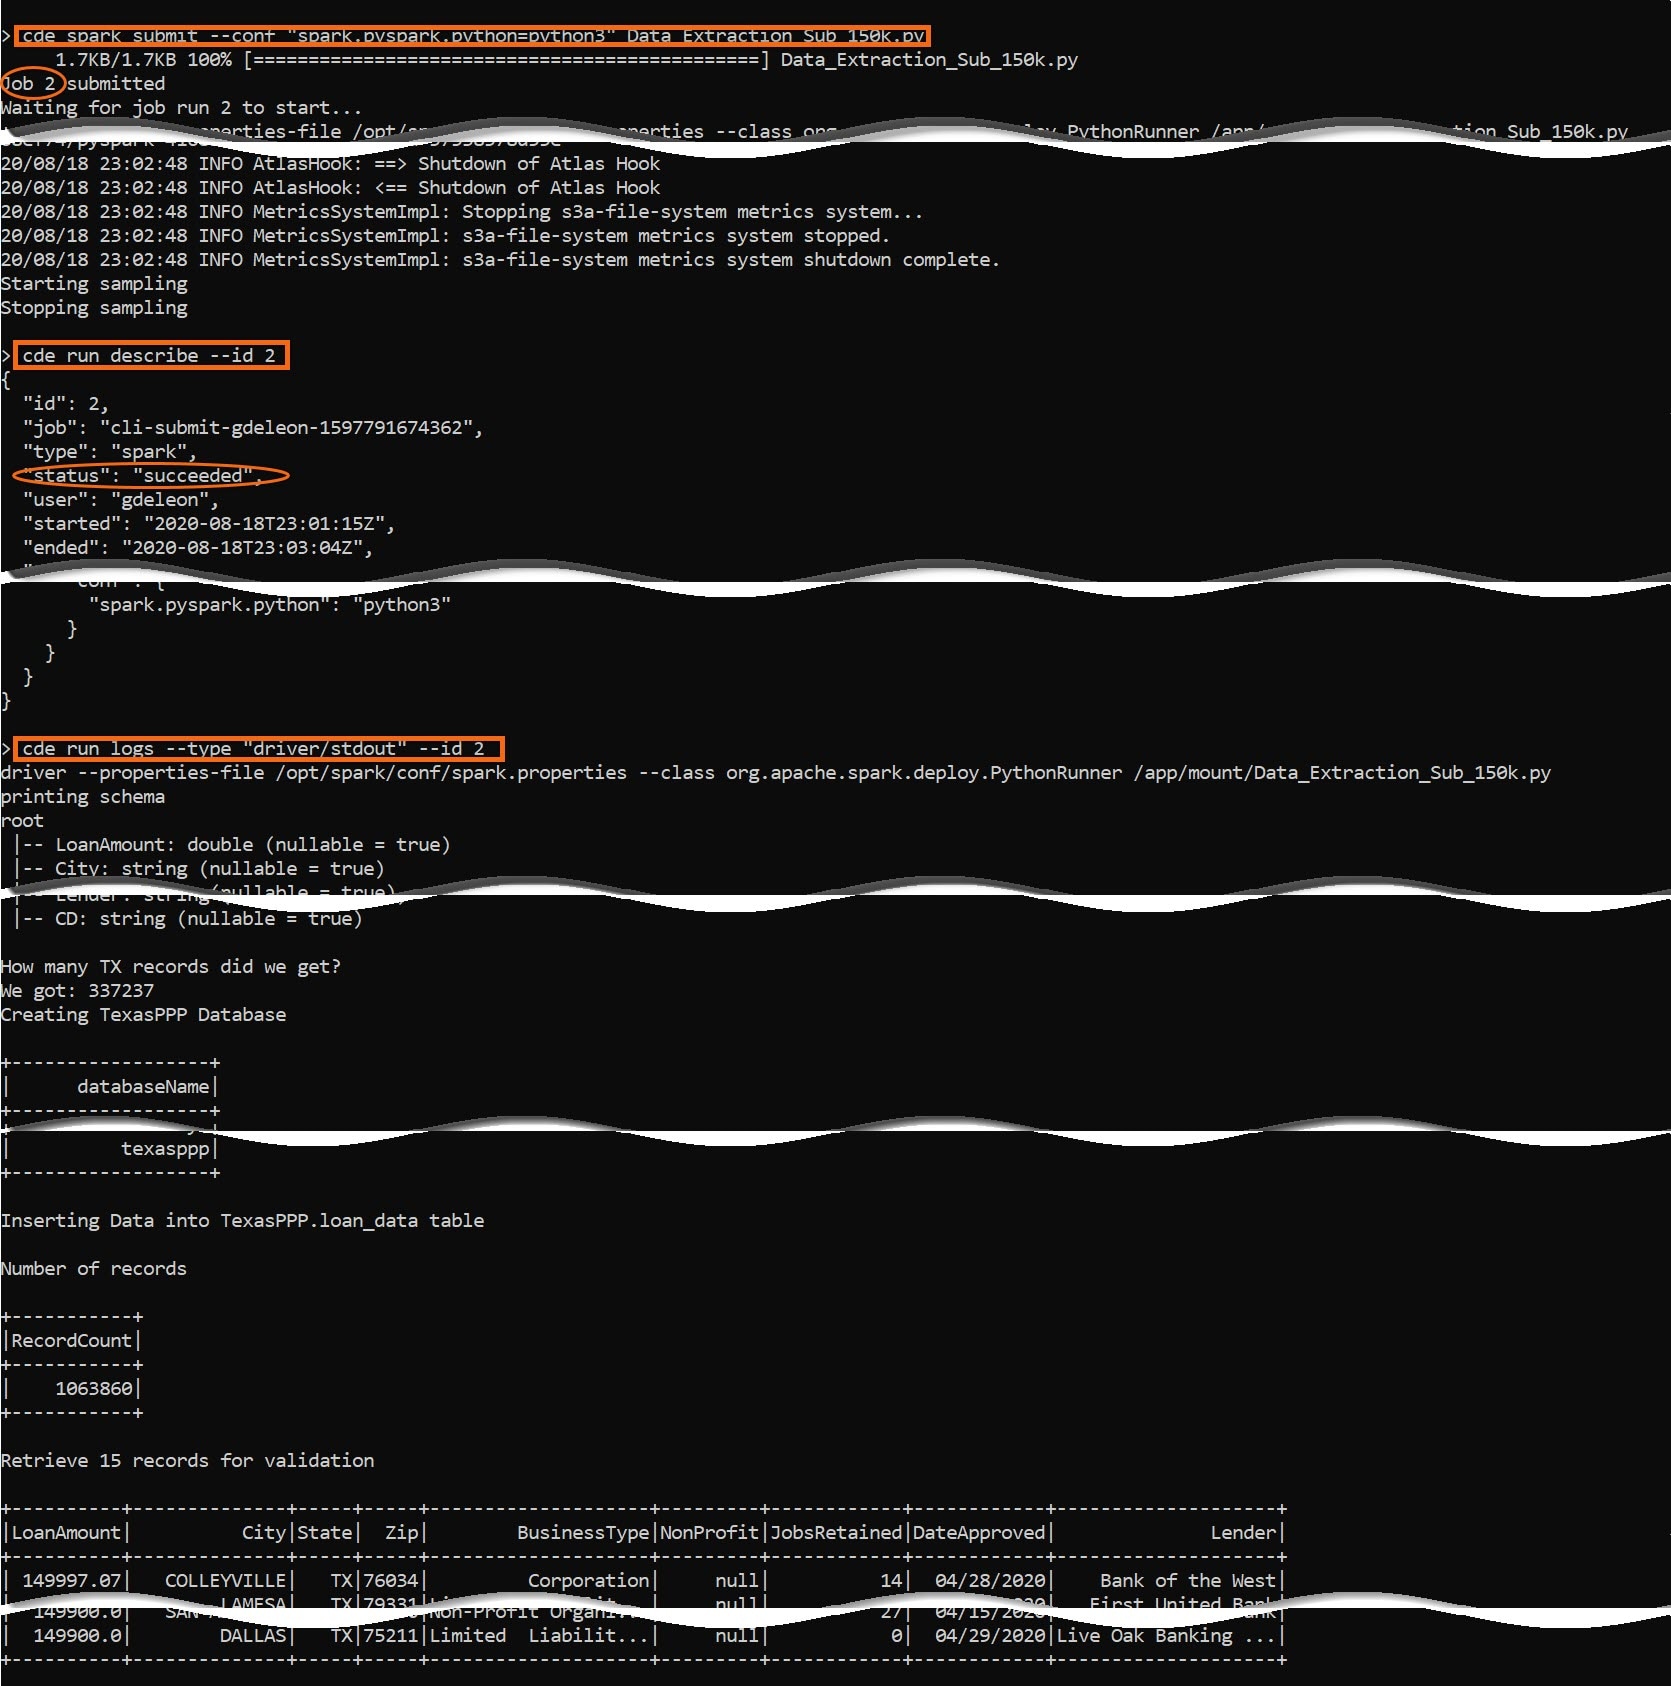
Run Spark Job:
cde spark submit --conf "spark.pyspark.python=python3" Data_Extraction_Sub_150k.py
Check Job Status:
cde run describe --id #, where # is the job id
Review the Output:
cde run logs --type "driver/stdout" --id #, where # is the job id
Create a resource
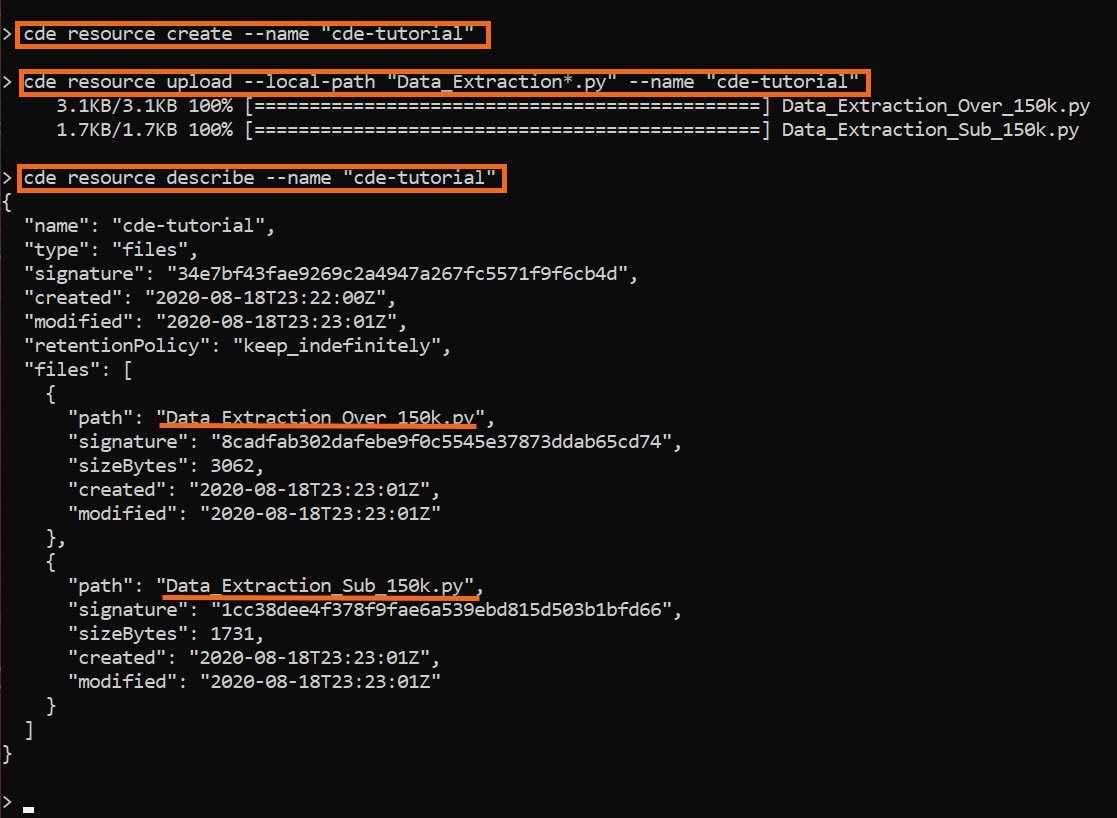
Create resource:
cde resource create --name "cde_ETL"
Upload file(s) to resource:
cde resource upload --local-path "Data_Extraction*.py" --name "cde_ETL"
Verify resource:
cde resource describe --name "cde_ETL"
Create and schedule jobs
Let's schedule two (2) jobs. The jobs have a dependency on an Apache Hive table, therefore we’ll schedule them a few minutes apart.
Schedule the jobs:
cde job create --name "Over_150K_ETL" \
          --type spark \
          --conf "spark.pyspark.python=python3" \
          --application-file "Data_Extraction_Over_150k.py" \
          --cron-expression "0 */1 * * *" \
          --schedule-enabled "true" \
          --schedule-start "2020-08-18" \
          --schedule-end "2021-08-18" \
          --mount-1-resource "cde_ETL"
cde job create --name "Sub_150K_ETL" \
          --type spark \
          --conf "spark.pyspark.python=python3" \
          --application-file "Data_Extraction_Sub_150k.py" \
          --cron-expression "15 */1 * * *" \
          --schedule-enabled "true" \
          --schedule-start "2020-08-18" \
          --schedule-end "2021-08-18" \
          --mount-1-resource "cde_ETL"
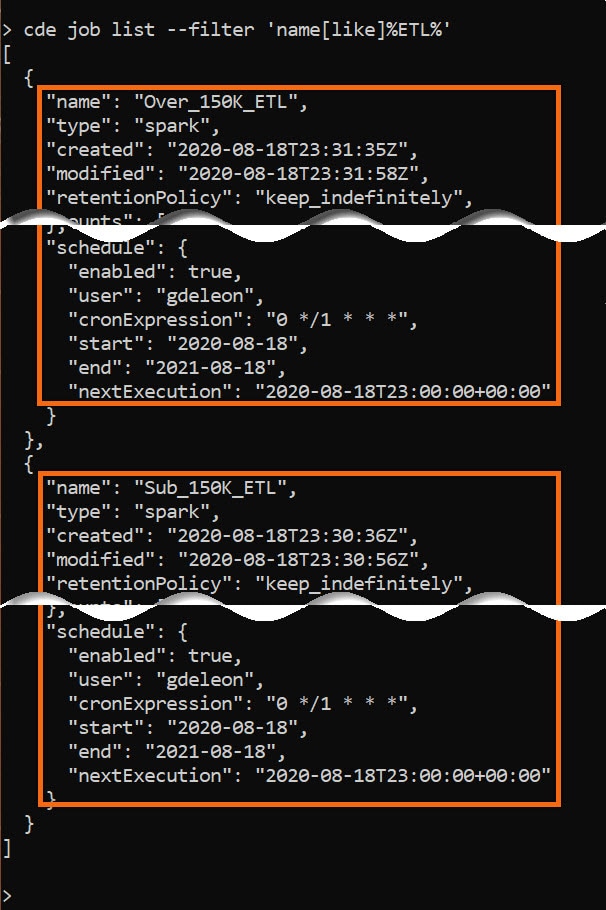
Confirm scheduling:
cde job list --filter 'name[like]%ETL%'
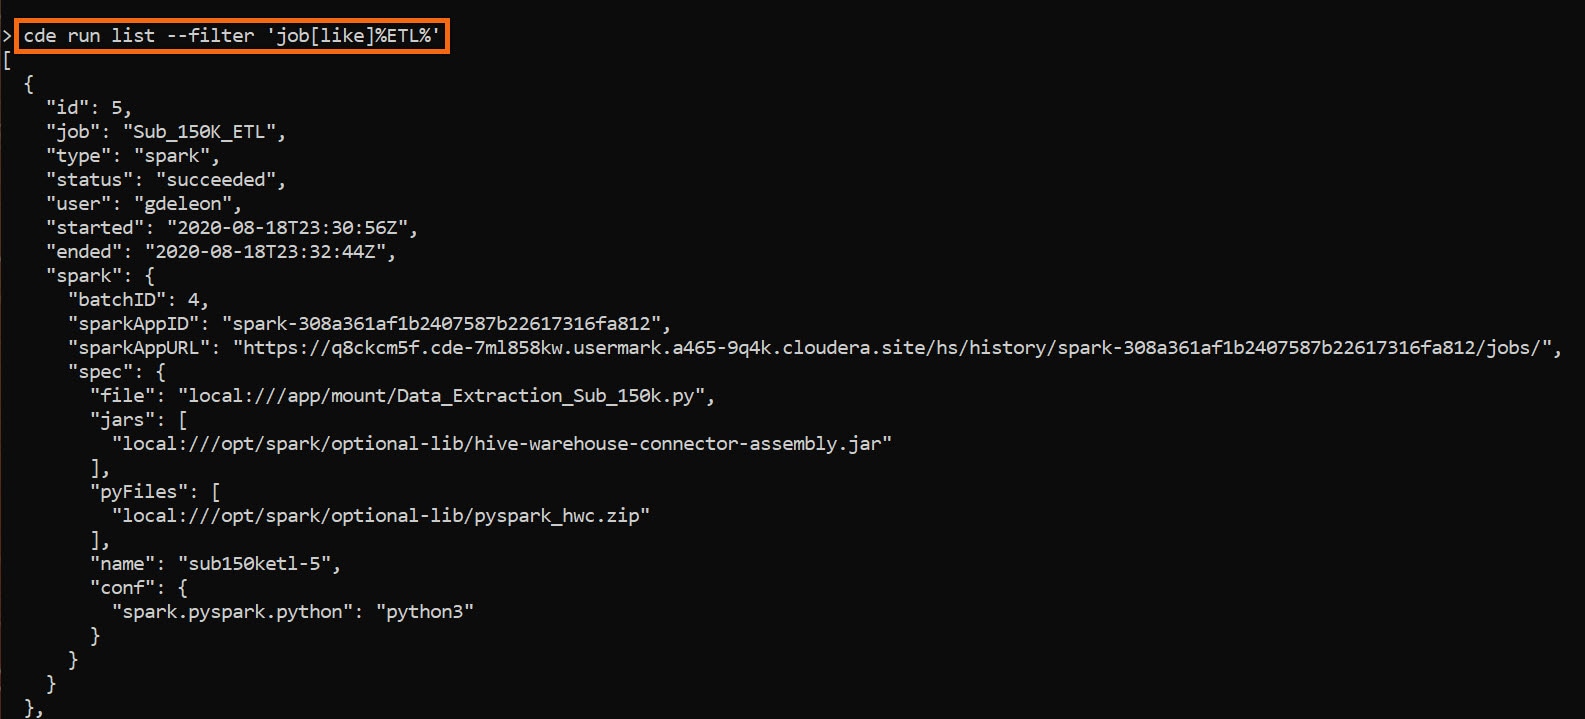
View Job Runs:
cde run list --filter 'job[like]%ETL%'
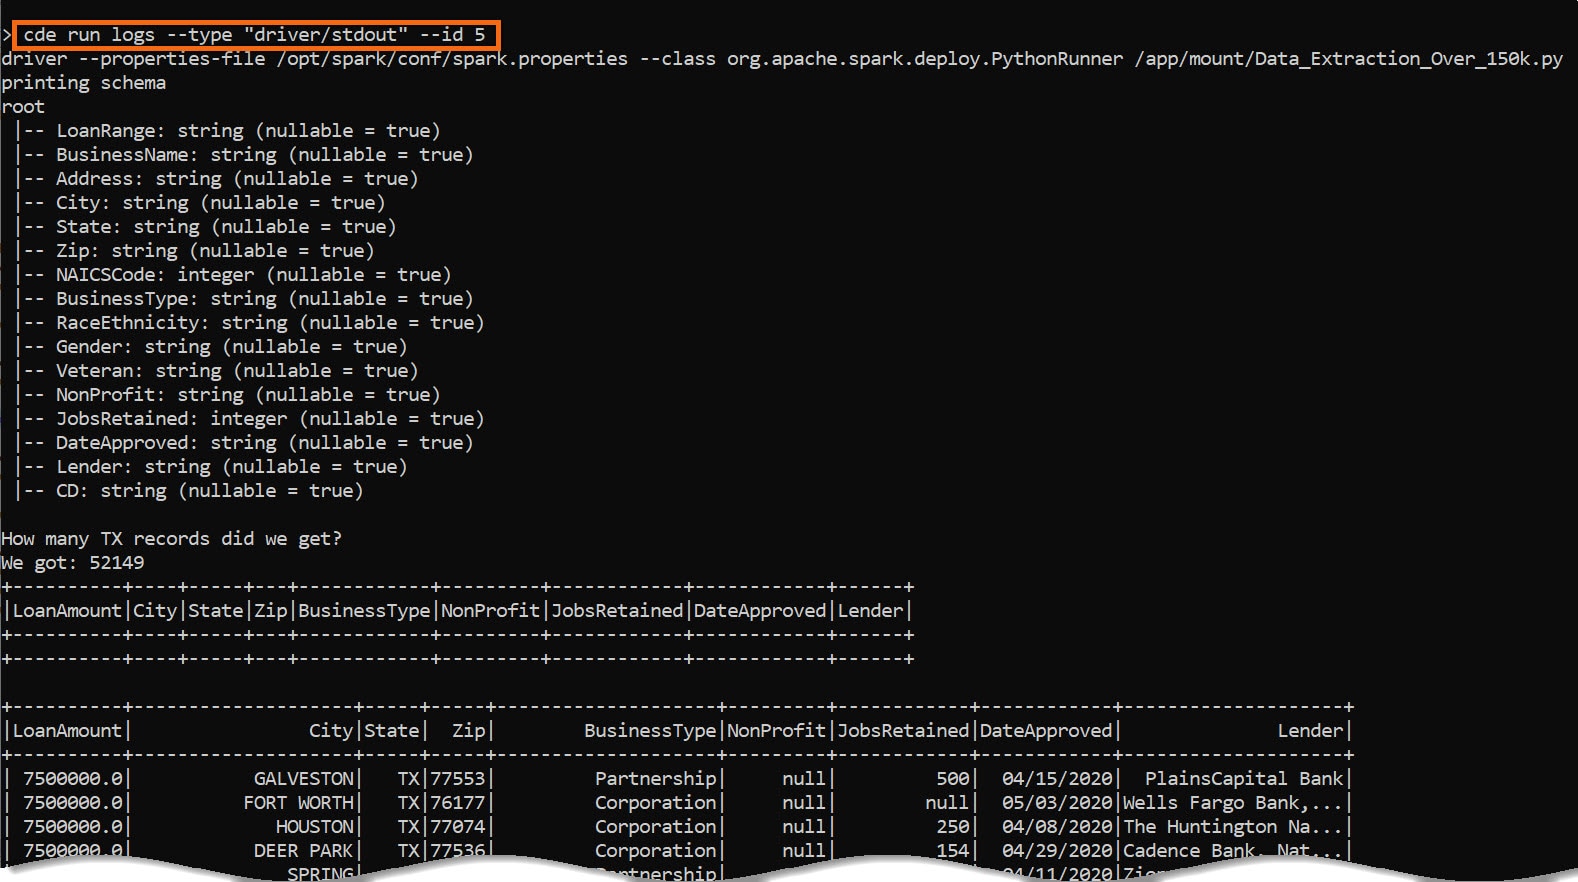
Review the Output:
cde run logs --type "driver/stdout" --id #, where # is the job id
Setup REST API
Cloudera Data Engineering uses JSON Web Tokens (JWT) for API authentication. To interact with a virtual cluster using the API, you must obtain and define the access token for that cluster.
We will define two (2) convenient environment variables:
- CDE_JOB_URL
- CDE_TOKEN
export CDE_JOB_URL="<jobs_api_url>", where <jobs_api_url> is a link found in Cluster Details
The access token, CDE_TOKEN, is a composition of hostname, literal value and parsed JSON value. The following command simplifies it for you. Refer to Getting a Cloudera Data Engineering API access token for details.
export CDE_TOKEN=$(curl -u <workload_user> $(echo '<grafana_charts>' | cut -d'/' -f1-3 | awk '{print $1"/gateway/authtkn/knoxtoken/api/v1/token"}') | jq -r '.access_token')
Where:
<workload_user> is workload user
<grafana_charts> is a link found in Cluster Details
NOTE: When the token expires, just re-run this command.


Now we have everything we need to make REST API calls. You can test and view API documentation directly in the virtual cluster by selecting the API DOC link found in Cluster Details.
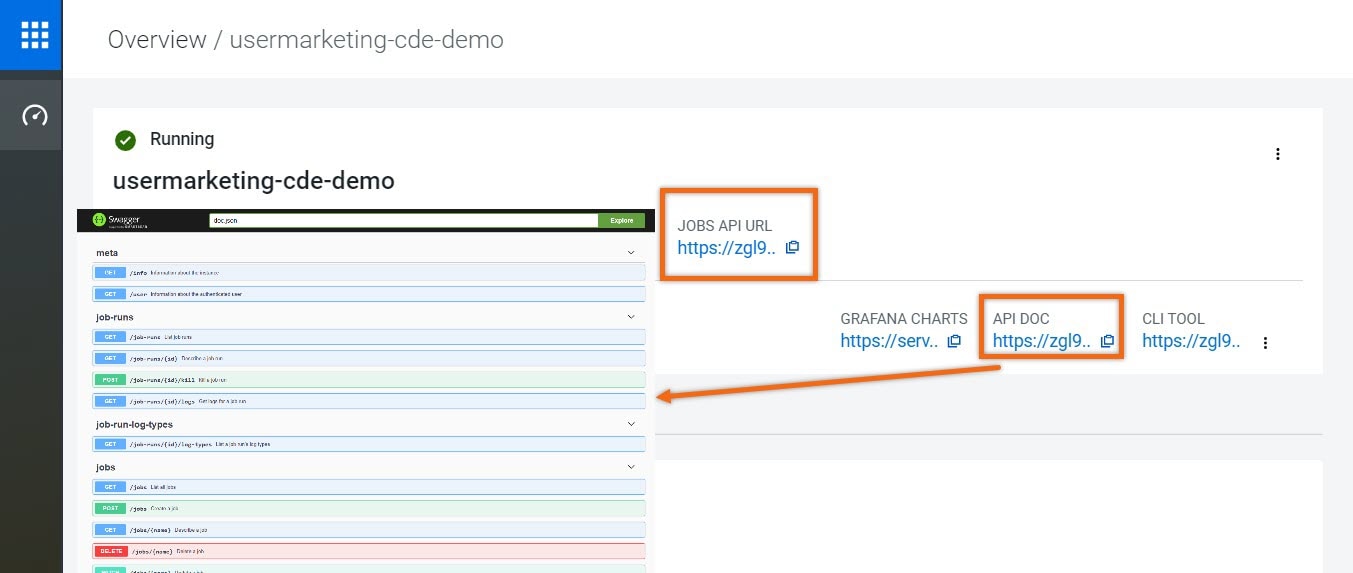
The command needed to make any REST API call is:
curl -H "Authorization: Bearer ${CDE_TOKEN}" -X <request_method> "${CDE_JOB_URL}/<api_command>" <api_options> | jq .
Where:
<request_method> is DELETE, GET, PATCH, POST or PUT; depending on your request
<api_command> is the command you’d like to execute from API DOC
<api_options> are the required options for requested command
Run Jobs using REST API
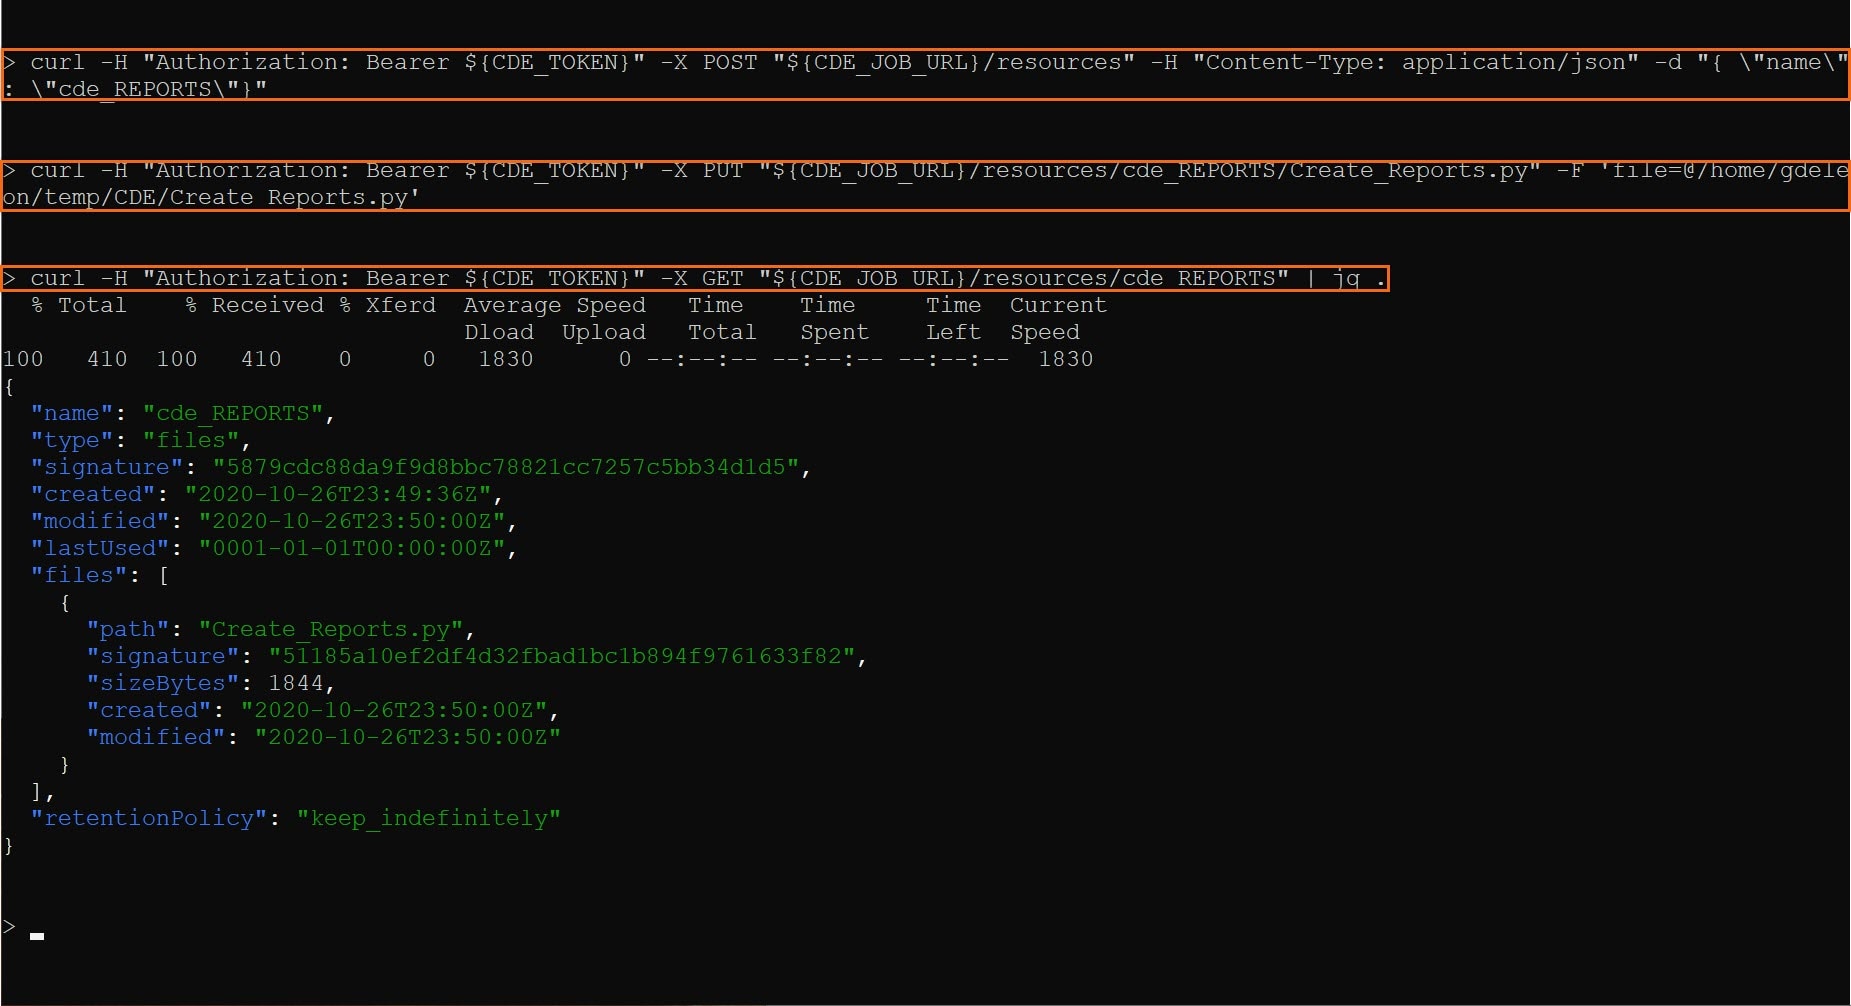
Let’s create a resource, cde_REPORTS, which will hold a Python program Create_Reports.py.
curl -H "Authorization: Bearer ${CDE_TOKEN}" -X POST "${CDE_JOB_URL}/resources" -H "Content-Type: application/json" -d "{ \"name\": \"cde_REPORTS\"}"
curl -H "Authorization: Bearer ${CDE_TOKEN}" -X PUT "${CDE_JOB_URL}/resources/cde_REPORTS/Create_Reports.py" -F 'file=@/home/gdeleon/tmp/Create_Reports.py'
Let’s verify:
curl -H "Authorization: Bearer ${CDE_TOKEN}" -X GET "${CDE_JOB_URL}/resources/cde_REPORTS" | jq .
Let’s schedule a job, Create_Report, to run every thirty minutes past the hour:
curl -H "Authorization: Bearer ${CDE_TOKEN}" -X POST "${CDE_JOB_URL}/jobs" -H "accept: application/json" -H "Content-Type: application/json" -d "{ \"name\": \"Create_Report\", \"type\": \"spark\", \"retentionPolicy\": \"keep_indefinitely\", \"mounts\": [ { \"dirPrefix\": \"/\", \"resourceName\": \"cde_REPORTS\" } ], \"spark\": { \"file\": \"Create_Reports.py\", \"conf\": { \"spark.pyspark.python\": \"python3\" } }, \"schedule\": { \"enabled\": true, \"user\": \"gdeleon\", \"cronExpression\": \"30 */1 * * *\", \"start\": \"2020-08-18\", \"end\": \"2021-08-18\" } }"
Let’s take a look at the most recent job execution:
curl -H "Authorization: Bearer ${CDE_TOKEN}" -X GET "${CDE_JOB_URL}/jobs?latestjob=true&filter=name%5Beq%5DCreate_Report&limit=20&offset=0&orderby=name&orderasc=true" | jq .
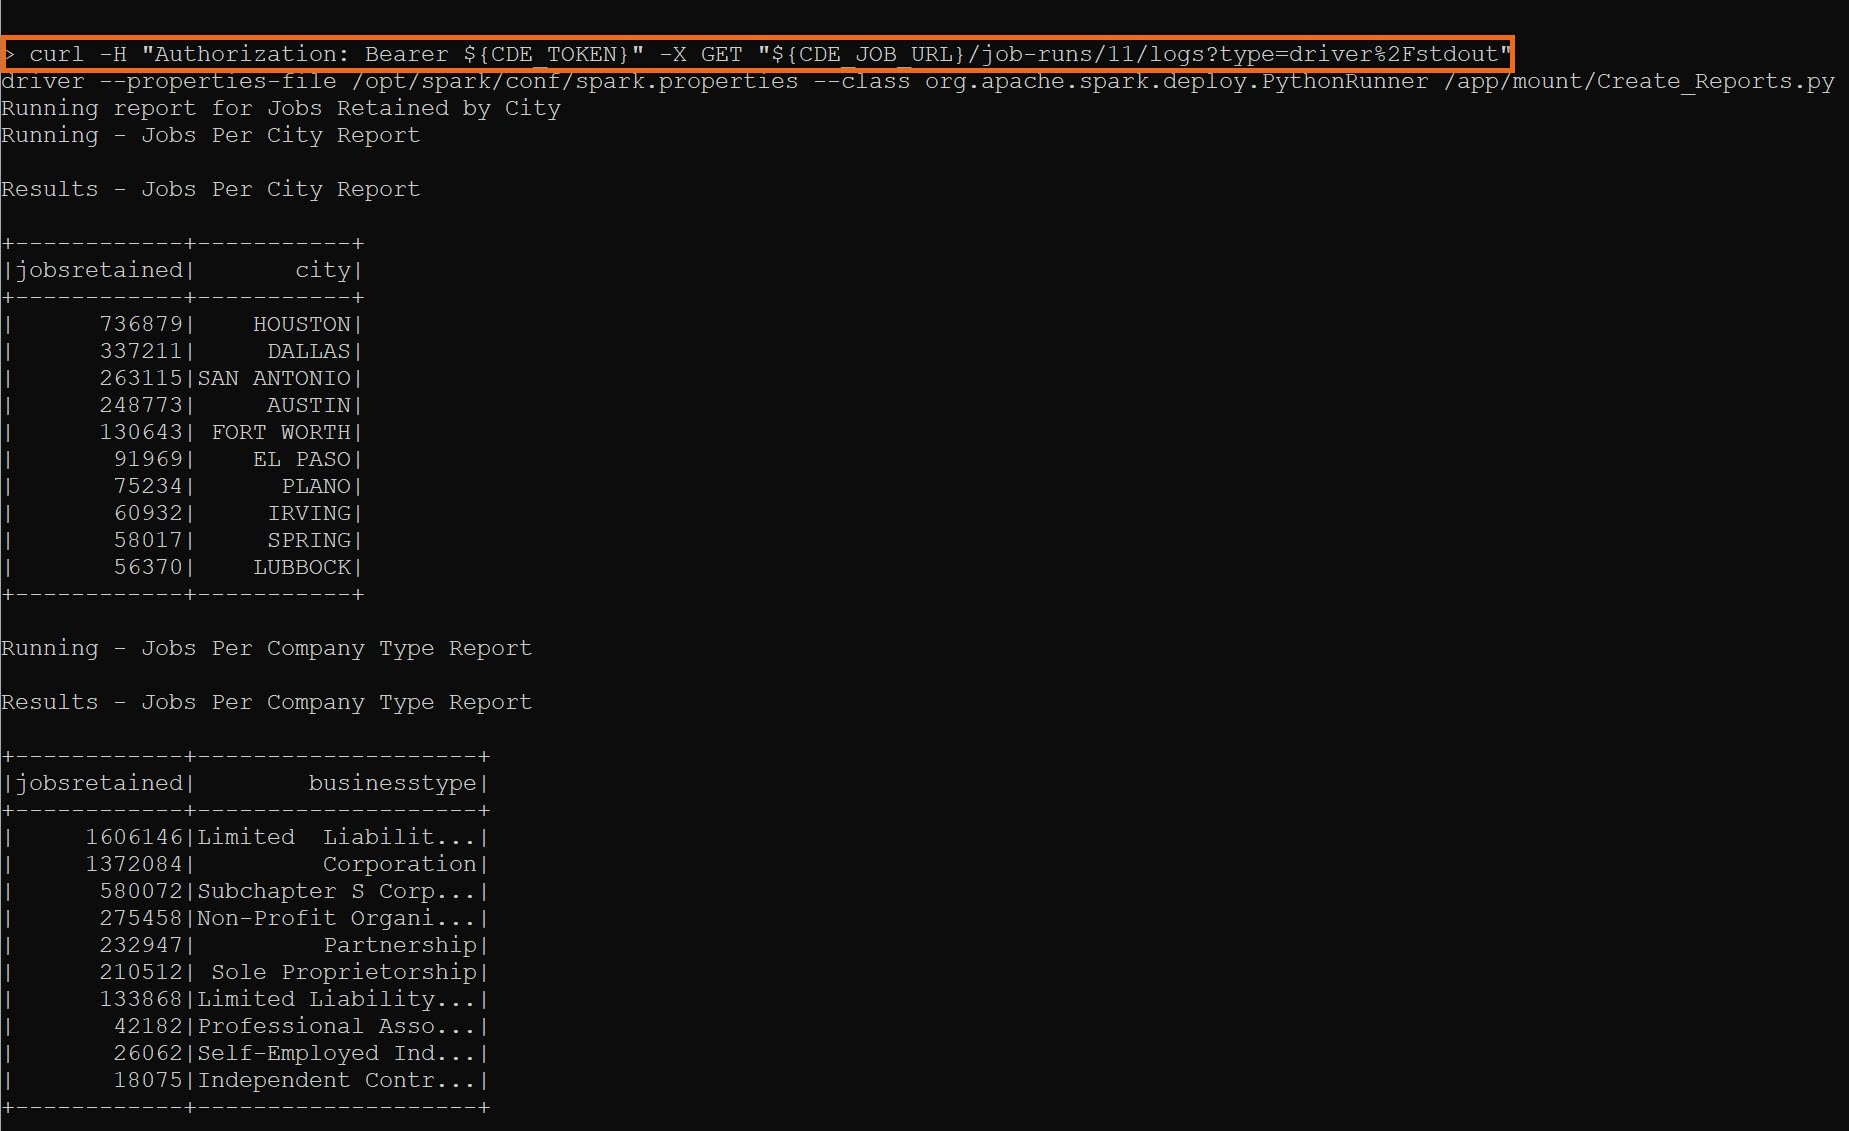
Let’s review the job output:
curl -H "Authorization: Bearer ${CDE_TOKEN}" -X GET "${CDE_JOB_URL}/job-runs/<JOB_ID>/logs?type=driver%2Fstdout"
